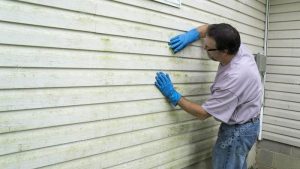
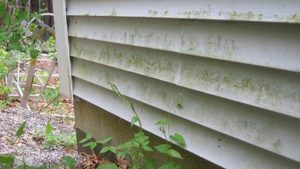
Although vinyl siding is built to be strong and durable, it can be damaged just like any other building material. Fortunately, there are several reliable ways to repair damaged vinyl siding yourself.
With the step-by-step instructions below, you'll learn how to fill, patch, or repair damaged vinyl siding like a pro.
In this guide
Can Vinyl Siding Be Repaired?
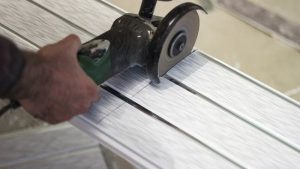
Vinyl siding is genuinely strong, but it can still get damaged. Worried about a falling tree branch or a stray baseball cracking one of your panels? Don't worry too much — with a zip tool and a replacement piece, you can typically have that section looking new again in about 15 minutes. It's as simple as unzipping the damaged panel and snapping a new one into place.
Learning how to repair vinyl siding yourself can make this kind of project a genuine DIY job rather than something you need to call a contractor for. With the right tools and a bit of care, you can quickly repair holes, cracks, or damaged sections of siding on your own.
How To Repair Holes In Vinyl Siding
A hole or puncture in your siding gives moisture, insects, and other pests a way to work into your home's exterior wall. Fortunately, holes in vinyl siding are usually easy to repair without professional help — this is a genuinely manageable task for most homeowners comfortable with basic DIY work.
The right repair approach depends mainly on the size of the hole. The trickiest part of the whole project is often just finding a replacement or matching siding piece close enough to the existing color of your home's siding.
Here's a breakdown of how to approach holes of different sizes.
Repairing a small puncture
A small hole in vinyl siding is a genuinely easy repair:
1. Clean around the puncture with a mild detergent.
2. Wipe the area dry with a cloth.
3. Load a tube of exterior-grade, color-matched vinyl-safe sealant into a caulking gun.
4. Inject sealant into the hole so it fills the space behind it as well as the hole itself.
5. Once the hole is filled, scrape away any excess sealant with a putty knife for a flush, clean finish.
Repairing a medium-sized hole in vinyl siding
1. Unlock the damaged panel from the panel below it using a zip tool (widely available at any home improvement store).
2. Apply exterior-grade foil tape evenly across the back of the panel, covering the opening.
3. Snap the panel back into its original position.
4. Apply a thin layer of exterior-grade sealant over the exposed foil tape from the front, or use a closely color-matched exterior paint if you can't find a sealant that matches well enough.
Repairing a large hole or tear
Larger holes or tears in siding take a bit more effort to repair properly:
1. Clean around the damaged area with mild detergent.
2. Wipe the area dry with a cloth.
3. Using a utility knife or heavy-duty scissors, cut a replacement piece of matching siding a few inches larger than the damaged opening on every side.
4. Trim the top and bottom edges of that replacement piece so it can fold slightly to match the profile of the surrounding siding.
5. Test-fit the piece over the hole to confirm it sits flush and folds correctly. Keep trimming the edges as needed until it fits properly.
6. Load a tube of matching exterior sealant into a caulking gun.
7. Apply a generous bead of sealant to the back of the replacement piece, plus a line of sealant around the perimeter of the hole itself.
8. Press the replacement piece firmly over the hole to create a solid seal.
Once the sealant has fully dried, use a utility knife to trim away any excess for a clean finish.
How To Patch a Vinyl Siding Hole
If a hole or crack is too large to fill with sealant alone, patching that section with matching siding is the better approach. It takes more work than a simple sealant fill, but the result is genuinely worth it once that unsightly damage disappears for good.
1. Clear the area. Clean the damaged section with soap and water before starting, and let it fully air dry for at least 2 hours.
2. Cut the replacement piece. Cut a section of matching siding slightly larger than the hole or crack. Trim off the top nailing strip (the perforated edge with pre-punched nail holes), being careful not to bend or crease the panel edges as you work. Trim the bottom edge of the piece to match as well.
3. Test-fit the cut piece. Hold the piece over the hole or crack so its fold lines up with the fold of the surrounding siding. Trim the curved edges further as needed until it sits snugly in place.
4. Patch it in place. Apply a strip of sealant along the back of the cut piece, plus a strip around the perimeter of the hole itself. Press the patch firmly over the damaged area and hold it until it's secure, making sure both surfaces bond together fully.
5. Let the sealant dry. Once cured, clean the surrounding area and wipe away any excess sealant for a clean finish.
How To Repair Cracked Vinyl Siding
Vinyl siding has become considerably more durable as manufacturing has improved, but it can still crack over time. Strong impacts, incorrect installation, and prolonged sun exposure are all common causes of cracking.
Left unrepaired, cracks let moisture seep in and can eventually lead to real water damage behind the siding. The good news is that repairing vinyl siding is a genuinely approachable DIY task — follow the steps below carefully, and it can be hard to tell the siding was ever damaged.
Repairing a crack with sealant alone is quick and works well for smaller cracks. For larger defects that sealant can't fully cover, patching the crack with a matching piece of siding, as described above, is the better route.
Wash and prepare the cracked area. Cleaning the area properly is an important step — skip it, and it can genuinely compromise how well the repair holds up over time. Clean the crack and surrounding area with a clean, lint-free cloth, mild soap, and water. If you'd rather skip soap and water, rubbing alcohol works as an alternative cleaning solution. Whichever method you use, make sure the surface is completely dry before moving on to sealing it.
Prepare the sealant. Load your sealant into a caulking gun, or apply it directly if you're using a precision-tip tube instead. Read the manufacturer's instructions for your specific sealant to check drying and curing times before you start, then apply it along the cracked area in a smooth, even, continuous line.
Smooth the application. After applying the sealant, use a putty knife to level it flush with the surrounding siding — the goal is for the repaired area to look like solid, undamaged siding once it's dry. Leveling it properly this way also helps the sealant work fully into the cracked area rather than just sitting on the surface.
Remove excess sealant. Once the sealant has fully dried and hardened, scrape away any excess with a utility knife or razor blade. This leaves a smoother surface and helps the repair blend in visually rather than standing out.
Apply matching color if needed. If you can't find a color-matched sealant, apply a closely matched exterior paint once the sealant has fully cured. Build up the paint over the repaired crack in thin layers, feathering the edges outward so the color blends smoothly into the surrounding siding rather than creating a visible patch line. Getting an exact color match can be tricky given how sun exposure and weathering can shift a siding's original color over time, but the feathering technique goes a long way toward disguising the repair. Let the paint dry completely before touching or testing the repaired area.
Best Glue To Repair Vinyl Siding
For small repairs, ordinary contact cement works genuinely well. If you're dealing with a small hole, cut a slightly larger opening around the damaged spot, apply contact cement and caulk to both surfaces, let them get tacky for a few minutes, then press the pieces back into place.
Loctite's vinyl, fabric, and flexible plastic adhesive is a clear liquid adhesive designed specifically for repairing and rejoining flexible plastics like vinyl sheeting, cushions, tarps, and outdoor equipment. Once dry, it forms a clear, waterproof bond, and it's well suited to surface repairs like vinyl siding specifically. Its precision applicator tip makes it easy to use cleanly on both large and small repair areas, and it dries clear and sets quickly, which helps prevent shifting or visible staining around the repair site afterward.
Vinyl window cement, of the type used for vinyl-framed replacement windows, or vinyl pool liner cement, can also work well for siding repairs in a pinch. A dedicated industrial vinyl cement paste, applied with a brush, is another solid option. Products in this category have been trusted by professional installers for years and are specifically formulated to hold vinyl materials firmly in place, forming a genuinely tough bond that stands up well to ongoing wear and weather exposure — which is exactly why they're a popular choice for vinyl repairs generally, siding included.
Best Caulk For Vinyl Siding
Exterior-grade silicone caulk is the most widely used option for vinyl siding repairs, thanks to its strength and water resistance. Silicone is also a genuinely versatile material generally, which makes it a solid choice for sealing vinyl siding specifically. One tradeoff: silicone caulk usually can't be painted over afterward, though many manufacturers offer it in a range of pre-matched colors to work around that limitation.
Latex and latex-acrylic caulks tend to be the least durable choice for exterior use, since they become rigid once cured and can't expand and contract along with temperature swings the way siding itself does. That rigidity means they tend to fail and need replacing considerably sooner than silicone, polyurethane, or butyl rubber-based caulks exposed to the same outdoor conditions.
Silicone generally offers better water resistance than polyurethane, while polyurethane tends to bond more reliably across a wider range of different materials, making it a solid choice specifically where two different materials need to be sealed together.
Vinyl Siding Vs Aluminum Siding
Durability is one of the most important qualities in any siding material — the last thing you want as a homeowner is a home that looks worn down simply because the siding itself has aged poorly.
Aluminum and vinyl are the two most common siding materials for exterior walls, and while both hold up reasonably well, vinyl is generally the more durable of the two. Unlike vinyl, aluminum siding is quite susceptible to dents, scratches, and other cosmetic blemishes, and once the paint on aluminum siding chips, the bare metal underneath becomes visible in a way that's hard to disguise. Vinyl siding is also considerably sturdier, typically running about twice the thickness of standard aluminum siding.
The cost difference between aluminum and vinyl siding is fairly modest. Aluminum siding is usually somewhat cheaper upfront than vinyl, largely because it tends to be thinner — but that lower initial cost can be offset over time by the expense of repairing dents and scratches that vinyl simply wouldn't show in the first place.
Vinyl siding also tends to offer a better return on investment and stronger resale value than aluminum, since aluminum's tendency to dent and show wear can actually work against a home's perceived value over time.
One common claim worth clarifying: on its own, neither vinyl nor aluminum siding provides much real insulation — both have a very low R-value when used without added insulation backing, so the material alone isn't what determines how much you'll rely on air conditioning in summer. What actually matters far more for energy efficiency is whether the siding is installed with a foam insulation backing, plus the quality of the insulation and air sealing already inside your walls. If energy performance is a priority, look specifically for insulated vinyl or insulated aluminum siding products rather than assuming either standard material delivers meaningful energy savings by itself.
Vinyl siding does hold up well against cracking, warping, and corrosion, and a properly installed panel leaves little room for pests to work their way underneath it. Weighing durability, maintenance, and overall versatility together, vinyl comes out ahead of aluminum for most homeowners.
In terms of long-term value, vinyl remains the stronger choice overall, since its durability tends to save money on repairs and touch-ups over the years, even if aluminum sometimes costs a little less upfront.
Vinyl Siding Related Posts
- How To Cut Vinyl Siding (Explained For Beginners)
- How To Hang Things On Vinyl Siding?
- How To Get Stain Off Vinyl Siding (Complete Guide)
- Painting Vinyl Siding: 8 Answers You Should Know!
- Vinyl Siding and Bugs: Important Information to Protect Your Home!
- Vinyl Siding: Effective Insulator or Not? (Everything You Need to Know)
- Vinyl Siding: Is It Right For Your Home? Find Out Here!
- Vinyl Siding: The Complete Maintenance Guide