A vent is a vital part of any plumbing fixture’s drain system. It serves to equalize pressure in the pipes, hence preventing the formation of a vacuum as the fixture drains.
However, installing a branch vent under a window can be a daunting task to run if you don’t have prior experience.
Plumbing codes require functional vent systems that prevent backward water flow and protect your health. To find out about the plumbing code requirements, use this link.
Any type of sink is useless without proper venting. But, many people cannot vent a kitchen sink under a window since the process, and the plumbing can be challenging.
This article will break down the step-by-step process of venting a kitchen sink under a window and why it is crucial. We’ll also answer some FAQs on venting a kitchen sink. Read on to discover more.
Why do You Vent Sinks?
A vent is a pipe used to lead air from your plumbing and out of your home. Vents usually rise to the roof where they vent without causing any harm to anyone.
The primary purpose of vents is to control the air pressure in your plumbing system.
Vents ensure fresh air flow by stopping harmful sewer gases from flowing back into your home.
Inhaling sewer gases can lead to dangers such as Hydrogen Sulfide poisoning, fire and explosion, and low oxygen levels.
Dizziness, nausea, suffocation, eye irritation, and drowsiness are some of the signs of toxic fumes from sewer gases.
The negative pressure resulting from draining water flow can suck water out of the building drain trap without relief vents.
As a result, gases from the main sewer line can enter your home. By allowing air into the drain pipes, vents help to keep the drain flowing correctly.
Common Types of Plumbing Vent Pipes
When installing every new plumbing fixture, it should be vented appropriately following the building codes. Consult with a professional before settling for any of the following individual vents.
- Truevent: This is a vertical pipe attached to the drain line. It vents from the roof, and water does not run through it.
- Common vent: You can use this vent between fixtures installed on the opposite sides of your wall, as the back-to-back island sinks. A sanitary cross is used to connect it to the stacks.
- Re–vent pipe or auxiliary vent: this vent pipe connects behind a plumbing fixture or to the waste line. It runs upwards and onto the vent line that goes up the roof.
- Air admittance valve(AAV): This valve opens when sewer water drains to let air in and stop any sewer gases from getting into the room. You can use air admittance valves as an addition to a vent, but they should not be installed in place of vent pipes.
A local plumbing inspector in the United States checks if you use suitable plumbing vent pipes for your septic system.
A Guide on How to Vent a Kitchen Sink Under the Window
Understanding how to vent a kitchen sink under the window is vital since the atmospheric pressure from the pipes makes the P-traps empty.
The process involves running the vent pipe horizontally under a window until the line joins the main building drain. The vent pipe should slope upwards.
You’re guaranteed to learn how to vent your kitchen sink under the window when you follow this guide. Let’s look at each step in detail.
Before getting started, make sure that you have:
- Sanitary tee pipe fitting
- Drill (for creating holes in the ventilation pipe)
- Hacksaw
- PVC pipes
Here is a step-by-step do-it-yourself guide.
1. Connect the Sink and the Waste Drain Pipe
The central drain line is found within the wall cavity. Ensure the tee is installed within 3 feet from the bottom of the P-trap to be effective.
Consult with your local plumbing inspector to ensure you use the right length of vents and follow your local venting code.
To connect the horizontal vent pipes with the 2-inch waste drain pipe from the toilet, add a 2-by2-by-1.5- inch PVC sanitary T-connector.
The fitting has three holes: a two-inch opening on the sides that leads to the sink pipe, a two-inch opening that faces down, and a 1.5 opening facing upwards.
2. Configure the vent pipe
Determine where the vent pipe is located. Look for the short distance between the vent pipe and the top of the sanitary T-fitting.
The vent pipe then extends horizontally through the wall studs until it reaches a vertical drain line. From there, the vent continues to ascend from the exterior wall.
3. Connect the pipe to the hole
Using the hacksaw, cut a vertical 1.5-inch PVC. With PVC primer and adhesive, attach the piece of pipe to the opening of the sanitary T-fitting.
The length of vents varies based on the horizontal drain pipe’s slope and width.
However, make sure it’s around two inches long under the international plumbing code.
4. Make a line that goes beyond the window.
Measure the slope and length of the horizontal vent drain. Draw a line on the wall studs to reflect the information.
According to the line curved on the wall studs, the horizontal vent pipe should slope upward at ¼ inch per foot.
5. Drill a 1 3/4-inch hole
Use your drill to make a 1 5/8-inch hole in each stud space between the elbow and the rising point of the vent, ensuring each hole is on the drawn line.
Push the horizontal pipe to connect it to the elbow, fitting through the holes to attach the two. Next, attach the second fitting with the gap facing upwards at the end of the horizontal pipe.
6. Install a PVC vent pipe
To install a straight-up PVC vent pipe to the attic, you need to drill through your ceiling plates. Once done, connect another PVC elbow to the vent pipe.
The vent pipe in the attic should run horizontally with the proper slope until it reaches the soil stacks and central vents.
7. Join the vent pipe to the stack
Local code measurements allow the diameter of vent pipes to be three or four inches. Using a PVC T-fitting, connect the vent pipe to the stack.
The dimensions of the tee should match the size of the stack and the 1.5-inch sink vent pipe.
When following the step-by-step guide, it’s best to use the same materials on your central or other vents.
Use the same PVC pipes for your kitchen sink drain vent and the same PVC glue to join the pipes.
Also, when making a path for your new vent through the attic, ensure it slopes no less than a quarter-inch per foot.
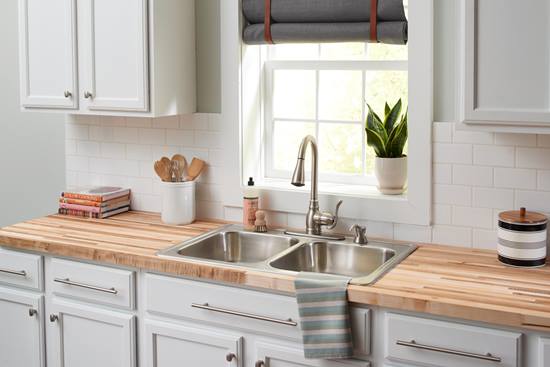
Why Should You Put a Kitchen Sink Under the Window?
The placement of sink vents under the window is complex, and venting is even more challenging.
So, why go through the struggle? Here are a few benefits of having a kitchen sink with a window right in front of it.
1. The view
A kitchen sink is most likely one of the most used fixtures in your home. You spend hours on the kitchen island preparing food and cleaning the sink daily.
The chores can be tedious, but you get a beautiful view of the outside through a kitchen window.
2. Natural light
Since kitchens are busy workspaces where a lot of delicate work gets done, adequate access to natural light through the window is good.
The natural light saves energy, makes the job easier, and helps make the room more pleasant.
3. Ventilation
Good and bad smells fill up the air when the kitchen gets hot.
Having a large window above the kitchen sink that you can open to let in a breeze and wind provides much-needed ventilation.
If you have dirty dishes in the sink, the outside air prevents the build-up of any smell.
Related >> Why Does My House Smell Like Paint?
4. Efficient use of cabinet space
The cabinets underneath your kitchen sink house indoor plumbing and give you easy access to the plumbing pipe during the placement of sink vents.
It also serves as an extra space in which you can store other bits and pieces. You, therefore, make up for the lost window space with storage space.
5. Interior Aesthetics
A window above your kitchen sink gives it a better look. Having a big window breaks up the busy workspace, allows a beautiful view, and provides natural light.
People Also Ask (FAQs)
Does every sink drain need a vent?
Yes, there will be an air pressure imbalance without a vent terminal that can cause harmful sewage gases to seep into your home.
A new vent line serves as an air pressure relief pipe, thus ensuring good drainage.
How far should the vent be from the kitchen sink?
A vent should be within 2 ½ feet of your sink’s trap. It’s ineffective if placed further away, and your sink will not work correctly.
How can I tell if my kitchen sink is vented?
You can check if your sink is vented by running a lot of water down the drain.
If you notice gurgles, bubbles, or pops from your kitchen sink, there is an issue with air pressure, and your vent is not properly vented.
Yes, two sinks can share a vent if they have the same flood-level rims of the highest fixture. In other words, they need to be of equal height to share a vent.
Why is there water coming out of my sink vent?
A blocked air gap can lead to water flowing out of your sink vent. Cleaning the drain trap to remove grease and other food debris from your kitchen sink can solve this issue.
Conclusion: How to Vent a Kitchen Sink Under a Window?
A kitchen sink underneath a window works well despite the tricky plumbing.
Your sink needs a vent, and it is possible to install one despite the complicated process.
Hopefully, this article has provided you with what is required to do it yourself.
However, don’t hesitate to consult a local professional inspector if you need to.
