Most individuals have raised garden beds or vegetable gardens to grow edible plants like fresh organic veggies, fruits, and flowers for organic gardening.
Raised bed gardening is frequently chosen as a gardening medium or exterior application when the soil in your garden is not optimal for plant growth.
In the event of rainfall or typhoons, the raised frames can help protect your plants from excessive flooding.
Reason to Paint Raised Garden Bed
Of course, because you’ve already put in so much time and effort to encourage plant development by constructing your garden beds, we may go a step further to extend the frame’s longevity.
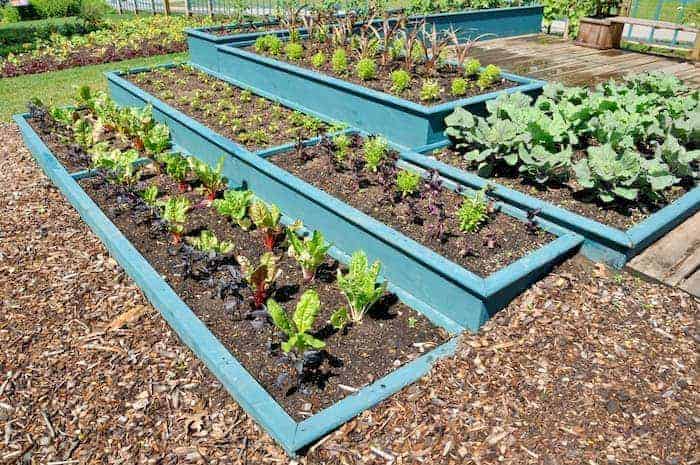
They not only raise garden beds to make them more aesthetically beautiful when painted, but they can also protect the frames from damage through non-toxic exterior paints.
You will need to provide clean water to your plants at least once every day to keep them alive and green.
However, moist soil would be a potential risk and can quickly deteriorate the condition of your frames.
So, to extend the life of your frames, you may always
How to Paint Raised Garden Beds?
While you can always replace the material used to raise your garden beds, painting them is also a good choice.
For starters, painting does not involve manipulating soil and does not necessitate re-building the frames from scratch.
What’s the Big Deal About Painting Garden Beds?
Any water-soluble
Leaching happens at the untreated wood’s surface.
Most gardeners will always line the inner side of a raised garden bed with plastic to reduce the possibility of leaching.
The rate of leaching is reduced if the wood is solely painted on the outside.
Oil-based paints versus water-based paints
There are numerous paints suited for painting on wood; the type you choose for your garden bed
When selecting the best way for garden bed paints, however, a lot of things are taken into account. These are some examples:
1) Durability
Because raised bed gardens are located outside, the wood used to frame the bed will expand and contract in response to air temperatures, especially when exposed to direct sunshine.
This will cause any painted surfaces to deteriorate over time. Moisture can permeate the wood when the
Oil paints take longer to dry but are more robust and long-lasting than water-based paints, which dry faster but do not last as long.
2) Eco-Friendliness
Water-based paints have no odors, but oil-based paints have volatile organic compounds and arsenic compounds that produce disagreeable odors.
When using oil-based paints, it is consequently a good idea to provide adequate ventilation.
3) Non-Toxic In Comparison to a Different Color of Paint
There is no discernible distinction between nontoxic and chemical-free paints.
They are environmentally benign, as their names suggest, with no negative impacts on the soil or garden beds.
Natural product paints and finishes, zero volatile organic compounds, and low volatile organic compounds are the three major categories of paints.
These groups are organized based on the degree of volatility.
Classification of Non-Toxic Paints
Non-toxic paints are classified according to their level of volatile organic chemicals. They are as follows:
1) Natural Colors
They are created from natural raw components. Water, plant oils and resins, natural latex, and milk casein are among them.
LIVOS, AURO, Weather-Boss, SILACOTE, Anna Sova, Green Planet Paints, and Master’s Blend are different colors.
2) Non-Volatile Organic Compounds
These are paints containing less than 5 grams of volatile organic chemicals per liter. When a color tint is applied to them, the concentration may rise to 10 grams/liter, which is still fairly low.
Among these are Earth Paints, Enso, American Pride, Olympic
3) Organic Compounds With Low Volatility
Water is used as a carrier, rather than as an oil-based solvent. They include trace amounts of heavy metals and formaldehyde.
They must not include more than 200 grams of volatile organic compounds per liter. They will emit disagreeable odors till totally dry.
Benjamin Moore Aura, Benjamin Moore SAMAN, Cloverdale Horizon, Miller
Chemical Free Paints
Natural ingredients such as plant oils and resins, water, plant dyes, essential oils, mineral oil made from minerals such as clay and chalk, casein from milk protein, natural latex, and beeswax are used to create these paints.
- There are no disagreeable odors in water-based natural paints.
- Natural oil paints offer pleasant citrus and essential oil aroma.
- Among these paints are LIVOS, AURO, SILACOTE, ANNA SOVA, and Weather-BOS.
- Natural Wood Preservatives
1) Oil of linseed
Linseed oil is an environmentally friendly stain and wood preservative that can be used in place of contemporary synthetic paints. It can be found in organic and natural forms.
It is readily applied with a brush, but it takes weeks to completely dry. It is affordable, but you must avoid any boiled variety because it contains dangerous ingredients. It is best to buy the raw version.
2) Wood Wax and Soapstone Sealant
It is a safe wood sealer that is mixed with food. It is made from carnauba wax and walnut oil. The
You can use soft cloth for this. It dries quickly, in twenty-four hours, and is thus deemed safe for persons who are sensitive to nuts.
The main negative of this
3) Milk Paint Made From Scratch
According to the name, it is made from curd cheese, milk, lime, and color pigments. It is the most basic and straightforward.
This
The most significant downside of using milk
It is recommended that after painting your garden with milk
4) Wood With Homemade Beeswax and Jojoba Oil
This mixture is an inexpensive and easy way to use. This wax protects the wood by repelling dust and moisture.
The finished product will make your garden beds shine and look gorgeous. Furthermore, when painted on your child’s furniture, it is an eco wood treatment.
5) Wood Sealer and Water-Proofer Soy-Seal
Soy-seal is a non-toxic wood sealant with no volatile organic chemicals.
It is a common material with a popular choice and contains oil and water and has a one-year warranty. It is easily available at department stores.
Painting Suggestions for Raised Garden Beds
1) Use Water-Based, Non-Toxic Paint
While there are very few 100% natural paints, there are several
Keep in mind that just because they are non-toxic does not imply you should eat them, but it is a better starting point than utilizing colors that cannot bear that designation.
You could also find and use mineral pigment paints, which are completely natural pigments but significantly more expensive.
2) Make Use Of A Bed Liner
Use a bed liner if you wish to
A thick plastic liner between the wood and the soil in which your plants grow will act as a barrier between the two.
Of course, you must take care not to puncture the liner and replace it if it deteriorates over time.
3) Remove Any Dirt Before Painting
If you are painting (or repainting) existing garden beds, thoroughly rinse them down and allow the wood to dry before painting.
Alternatively, you might use a wire brush to remove even the most stubborn dirt particles.
The important thing here is to ensure that the
4) Think About Oops Paint
Many DIY stores sell
You can certainly strike it rich if you are in the right store at the right time. Just make sure to use the correct type of
Determine whether to use a protective coat
Following the painting of your beds, you must select whether or not to apply a protective coat to old
The goal of painting is to make resistant wood and to extend the life of the natural wood surface while also improving the appearance of the garden.
There are numerous top coats to choose from. You might use natural ingredients like natural wax or a poly-acrylic topcoat instead.
You have the option; just keep in mind the components in the paints and sealers you use.
Some Additional Guidelines for Painting Your Raised Garden Bed
The first step, make sure the surface is clean and primed for ease of use.
To clean the rock kind of raised bed surfaces, avoid using soap as an important thing since it can easily cause you to remove their particles.
Consider Cultivating on Stained Raised Bed Surfaces
Always invest a little extra in high-quality paints and brushes to ensure a smooth working environment.
Alternatively, stained surfaces like bricks and wood can be used to add a different tone of color and sheen to your raised garden beds.
Prepare Your Raised Garden Bed for Painting Ahead of Time
Also, make sure you have the correct materials before you start painting since once you’ve painted on surfaces like bricks, it can be difficult to remove the
Consider Acrylic Paint If You Use a Rock Material for the Raised Garden Bed Frame
Rocks may add a unique aspect to your garden, and if you’ve chosen them to raise your garden beds, you can easily color them if you’re in the mood!
If you plan on painting outdoor structures such as on a rock, outdoor acrylic paints will work best because they will remain for a long time and can withstand harsh weather.
For outdoor use, you can also spray
Before You Begin Painting Your Raised Garden Bed, Make the Following Preparations:
For exterior use, before painting the frames, any gardener must remove any dirt or dust that has accumulated on the exterior over the years.
There are several great ways for cleaning the frames from the outside to get the best results:
1) Clean Your Raised Garden Bed With a Sponge Before Painting it
To remove grime, use a sponge and soapy water to lightly wire brush the surfaces. After that, wash the frames with clean water and allow them to dry before painting.
2) Cleaning Your Raised Garden Bed Before Painting it
If the frames are made of wood, scrape off the surfaces using a wood scraper from your toolkit.
Scraping will give the garden beds a brighter layer for you to
These are the two best options available for cleaning surfaces. If not, you may always use a duster or a clean cloth soaked in water to get the job done.
If the surface is composed of wood, it is always a great idea to sand it before painting it.
3) Painting the Raised Garden Bed Frames
Painting might be a difficult task if you have never done it before. To
Apply even brush strokes to the surface to give it a nice finish. You can
A roller will provide the greatest results when painting your raised garden bed and will allow you to
If you are unhappy with the hue, you can apply another layer after it has dried. Begin with small layers of coating and work your way up to thicker ones.
A second coating will make it last longer and keep your frames from degrading.
The Benefits and Drawbacks of Painting Raised Garden Beds
As with anything in life, there are advantages and disadvantages to painting a raised garden bed. Here are a few examples;
1) Help Save the Wood
Anything that keeps moisture from penetrating the wood will work as a preservative to some extent and a safe alternative.
Paint is no different. Of course, that security is contingent on several circumstances, including:
- How many sides of the wood are painted?
- What type of
paint is used? - How many coats of
paint are applied?
2) Color and Decoration are Provided by Paint
The other advantage, of course, is that painting your mattresses can improve their visual appeal.
Maybe you want them to match your house or the surrounding environment. Maybe you have a communal garden and want to encourage the kids to make their beds.
Whatever the case, the color of the wood can surely give charm to different types of wood used for any purpose, even raised garden beds.
The Major drawback of Painting Raised Garden Beds
Leaching of Paint Chemicals into the Soil
The main risk of chemicals in the
When the edible crops are grown in the toxic soil and you put them into your body or utilize them to feed your family, you must decide whether the potential downsides exceed the potential positives.
Some claim that painting simply the outside of the garden beds with non-toxic water-based
The possibility of chemicals leaking through from the exterior of the wood to the interior of the bed, then into the soil, and finally into the growing food may be the biggest concern among others.
Epilogue
The color you choose for your new raised beds is an important thing in gardening.
Choose paints with minimal to zero volatile organic chemicals, as well as paints that dry quickly and are odorless. This will help to reduce soil leaching and chemical release.
Use non-toxic, chemical-free
Spend a little bit more money on
Good coatings will allow the bricks to breathe, allowing them to survive longer.
Porous paints will be a good thing in this application. For optimal results, use a conditioner and a primer before painting.
Overall, use this opportunity to let your originality shine. There may be multiple advantages in terms of longevity.
